Create Task
To create a task, start by clicking the ADD TASK button on top right of the tasks page
On Clicking the ADD TASK button, the task creation window will open. Enter the details given below in each sections to complete the task creation
Task Details
In the Fill Task Details tab, enter the following details:
- Task Name: Name of the task
- Task Description: Description of the task
- Dataset Name: Name of the Dataset to be used in the Task
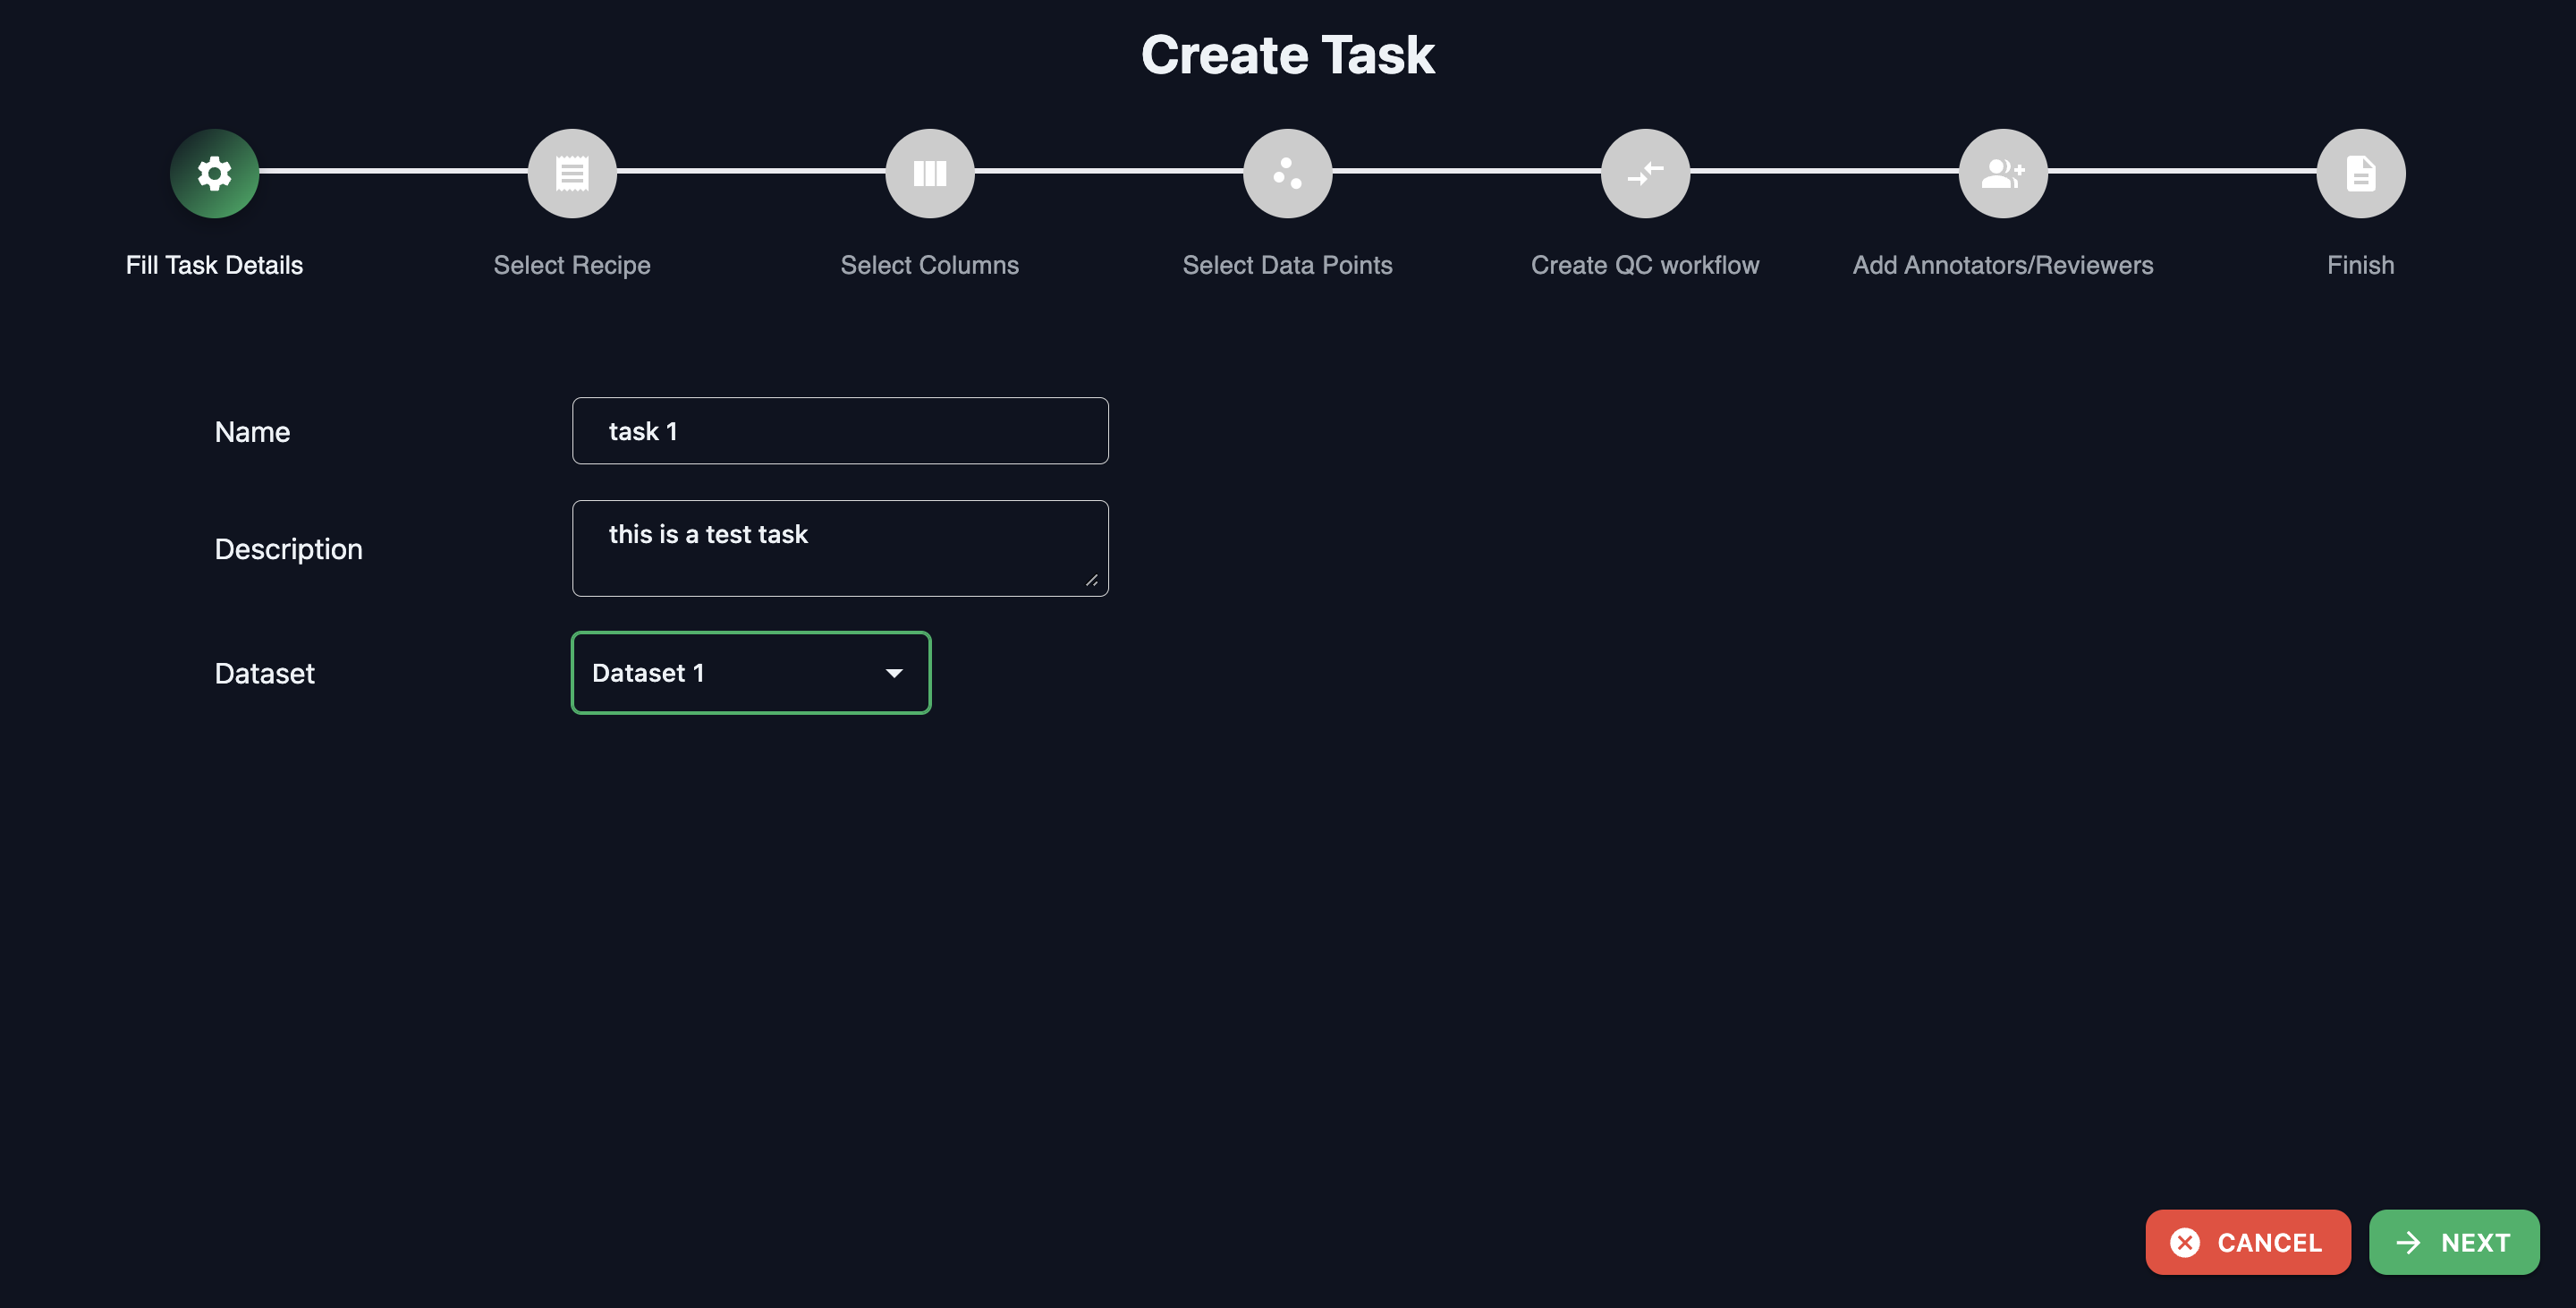
Click on the NEXT button to move into adding recipe details
Select Recipe
In the Recipe Details tab, select the recipe to be used for the annotation job.
Note: Click on each recipe to view more details on the recipe
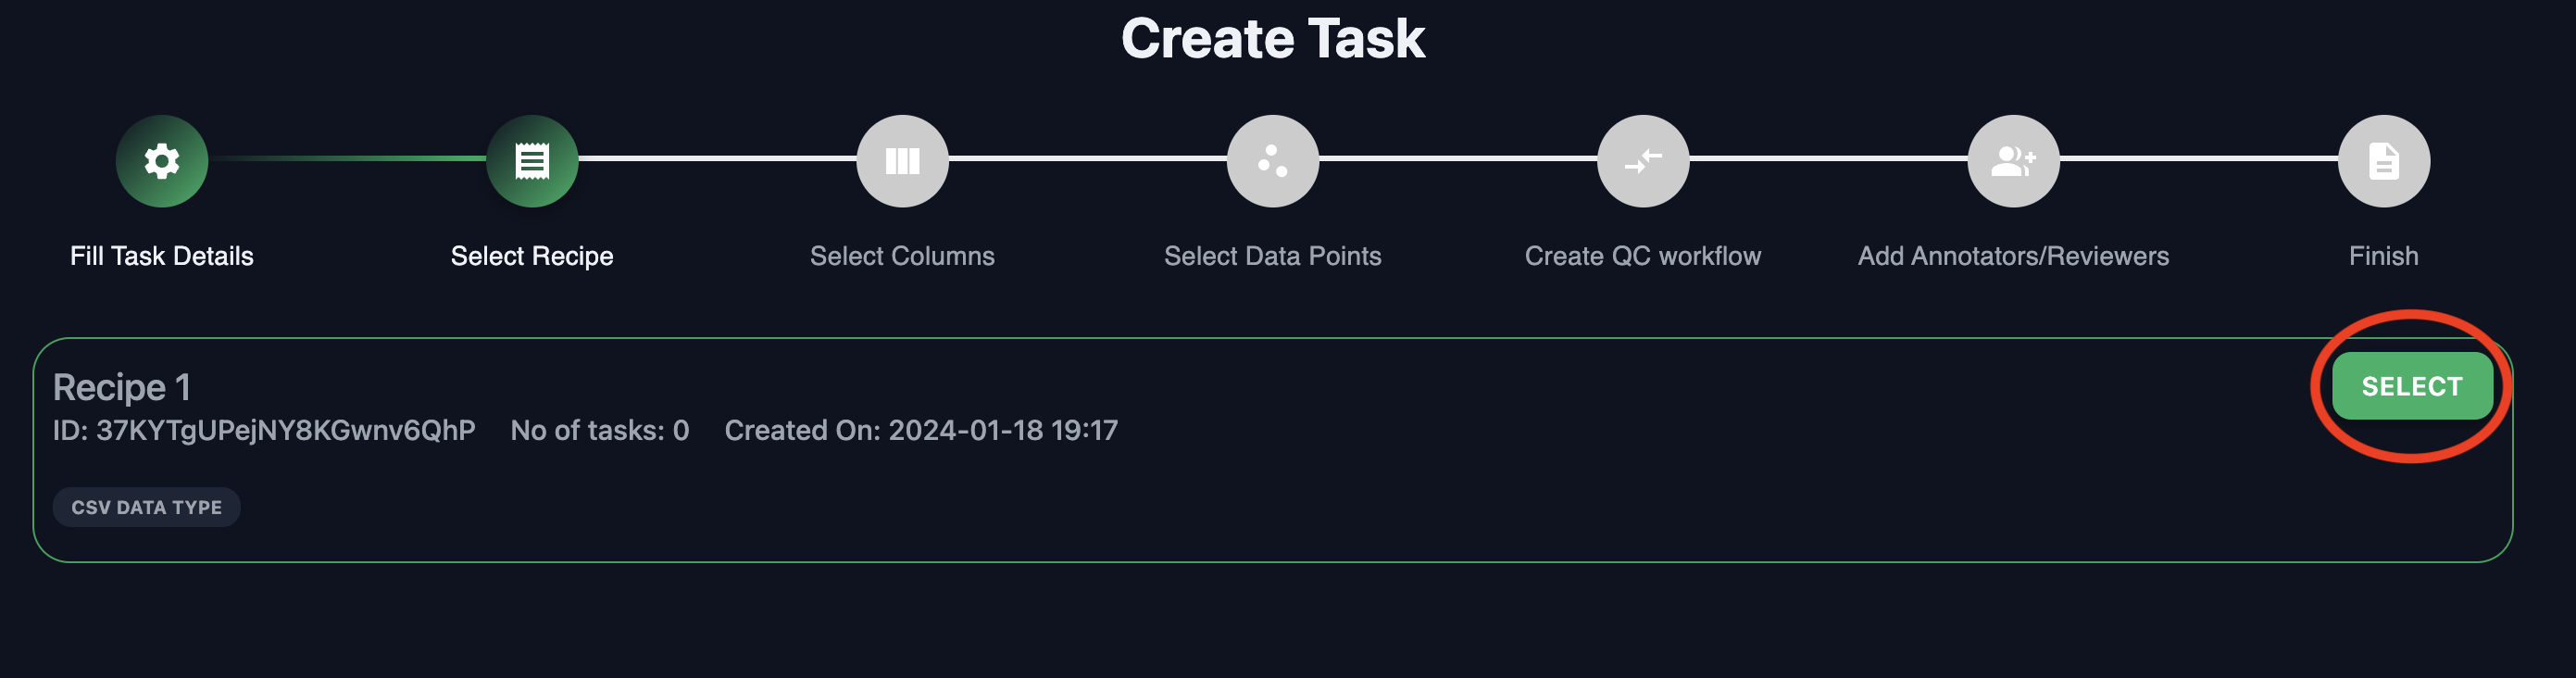
Select the recipe required to create the task by clicking on the SELECT button.
Click on the NEXT button to move into select columns tab
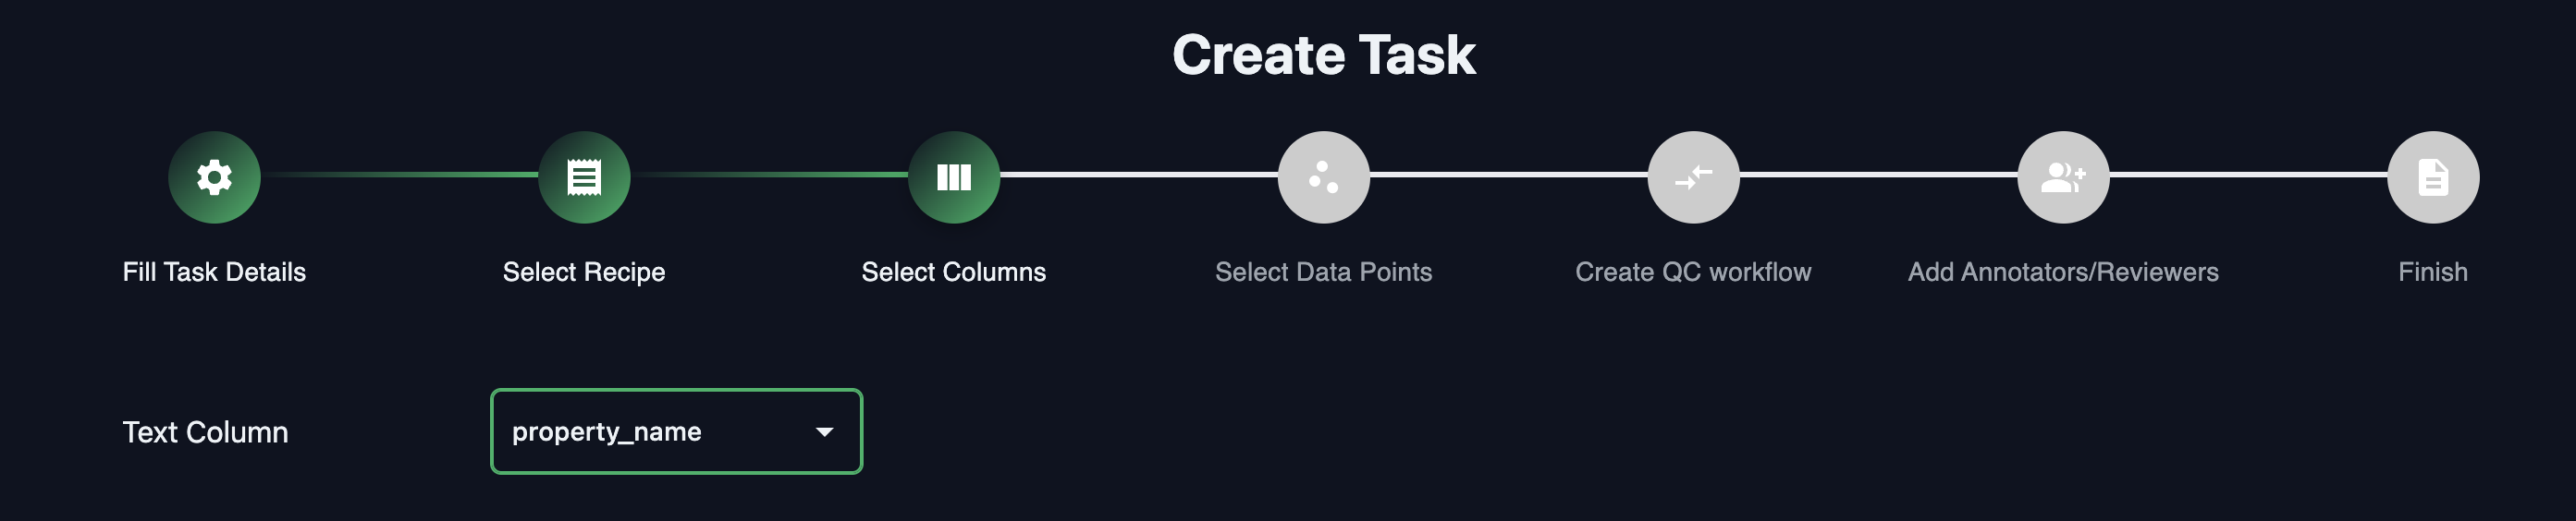
Select Columns
In the Select Columns tab, select the columns in the dataset to be used for the annotation job.
Note: Select the columns based on each task. Only this columns will be used at the time of annotation. But the final exported data will contain the complete csv along with the annotated data.
The dropdown will have all the columns from the selected dataset. Select the columns to be included in the annotation window. Based on the task, there will be multiple columns to be selected. An example is shown below:
Click on the NEXT button to move into data point selection tab
Select Data Points
Annolive lets users to select data points from the dataset in different ways. Click on the SAMPLE button to select the sampling method to be used for data selection. Alternatively you can also manually select or deselect data points to be annotated or ignored respectively.

There are three sampling methods:
| Sampling Method | Details |
|---|---|
| Select All | "Select All" will result in the annotation job to annotate all the data points in the dataset |
| Select Range | Annotate a consecutive set of data points from the dataset. This method is suitable for batchwise annotation |
| Select Random | Randomly select some defined number of points. This recomended when you are testing the annotation |
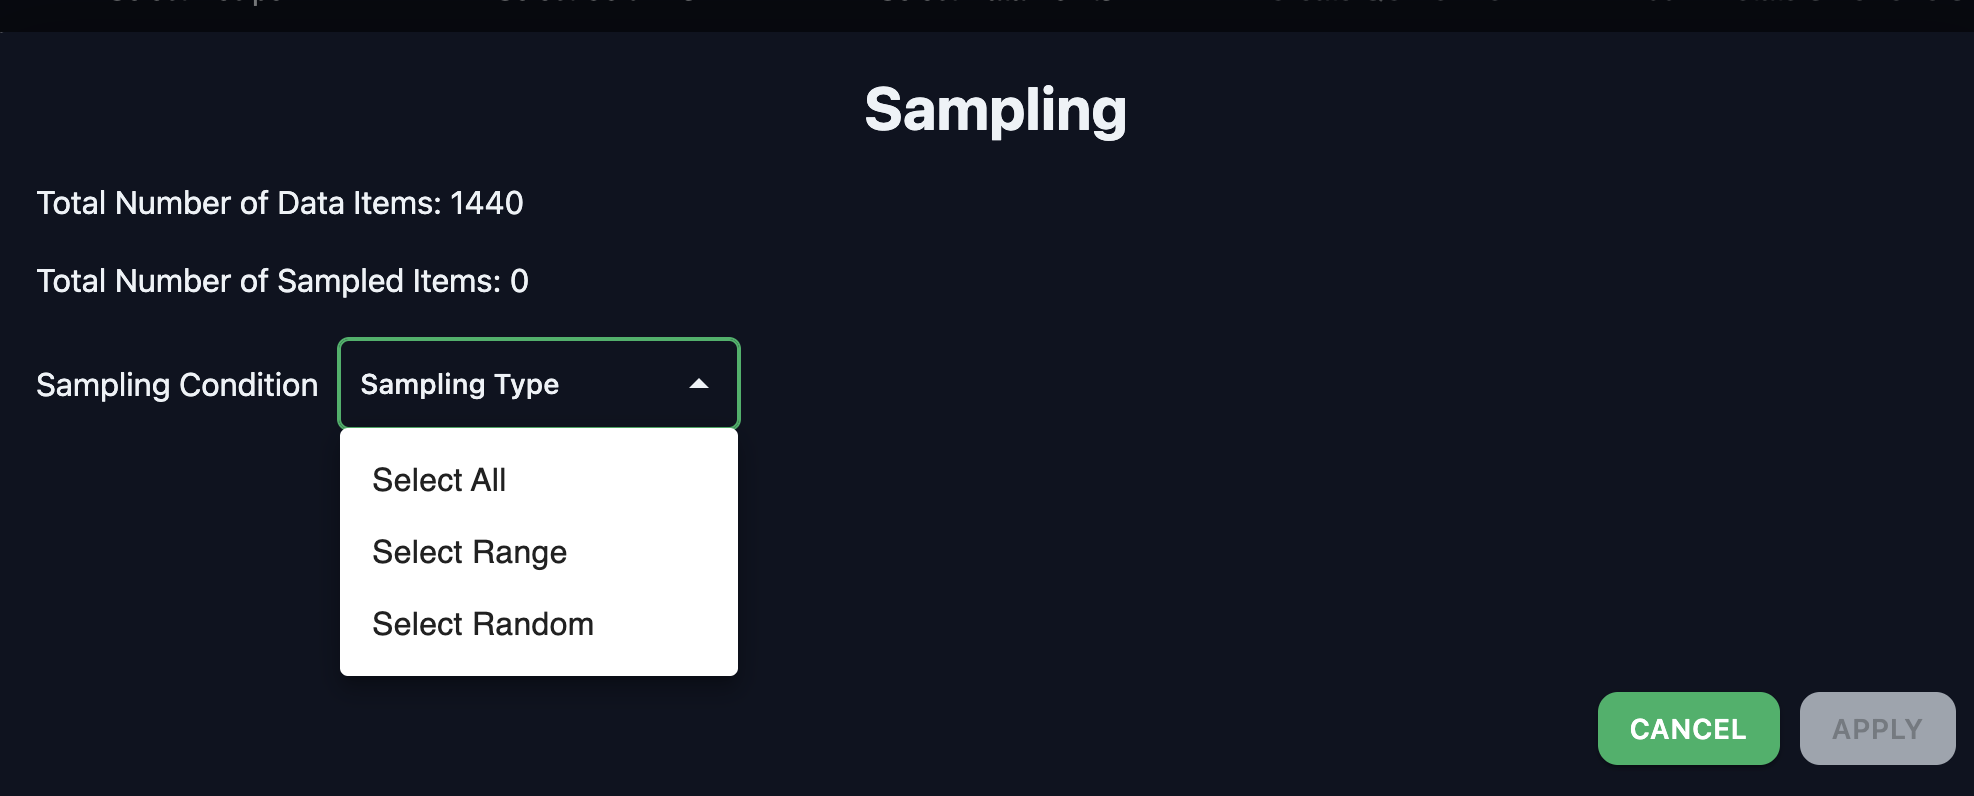
Note: Even if you annotate some or whole of the dataset, you can export the already annotated data before the complete dataset annotation is finished
Click on the NEXT button to move to the Workflow selection tab
QC Workflow
Based on the level of quality check and urgency of the annotation, users can select different Quality Check Workflow. There are three workflows available on Annolive, they are give below.
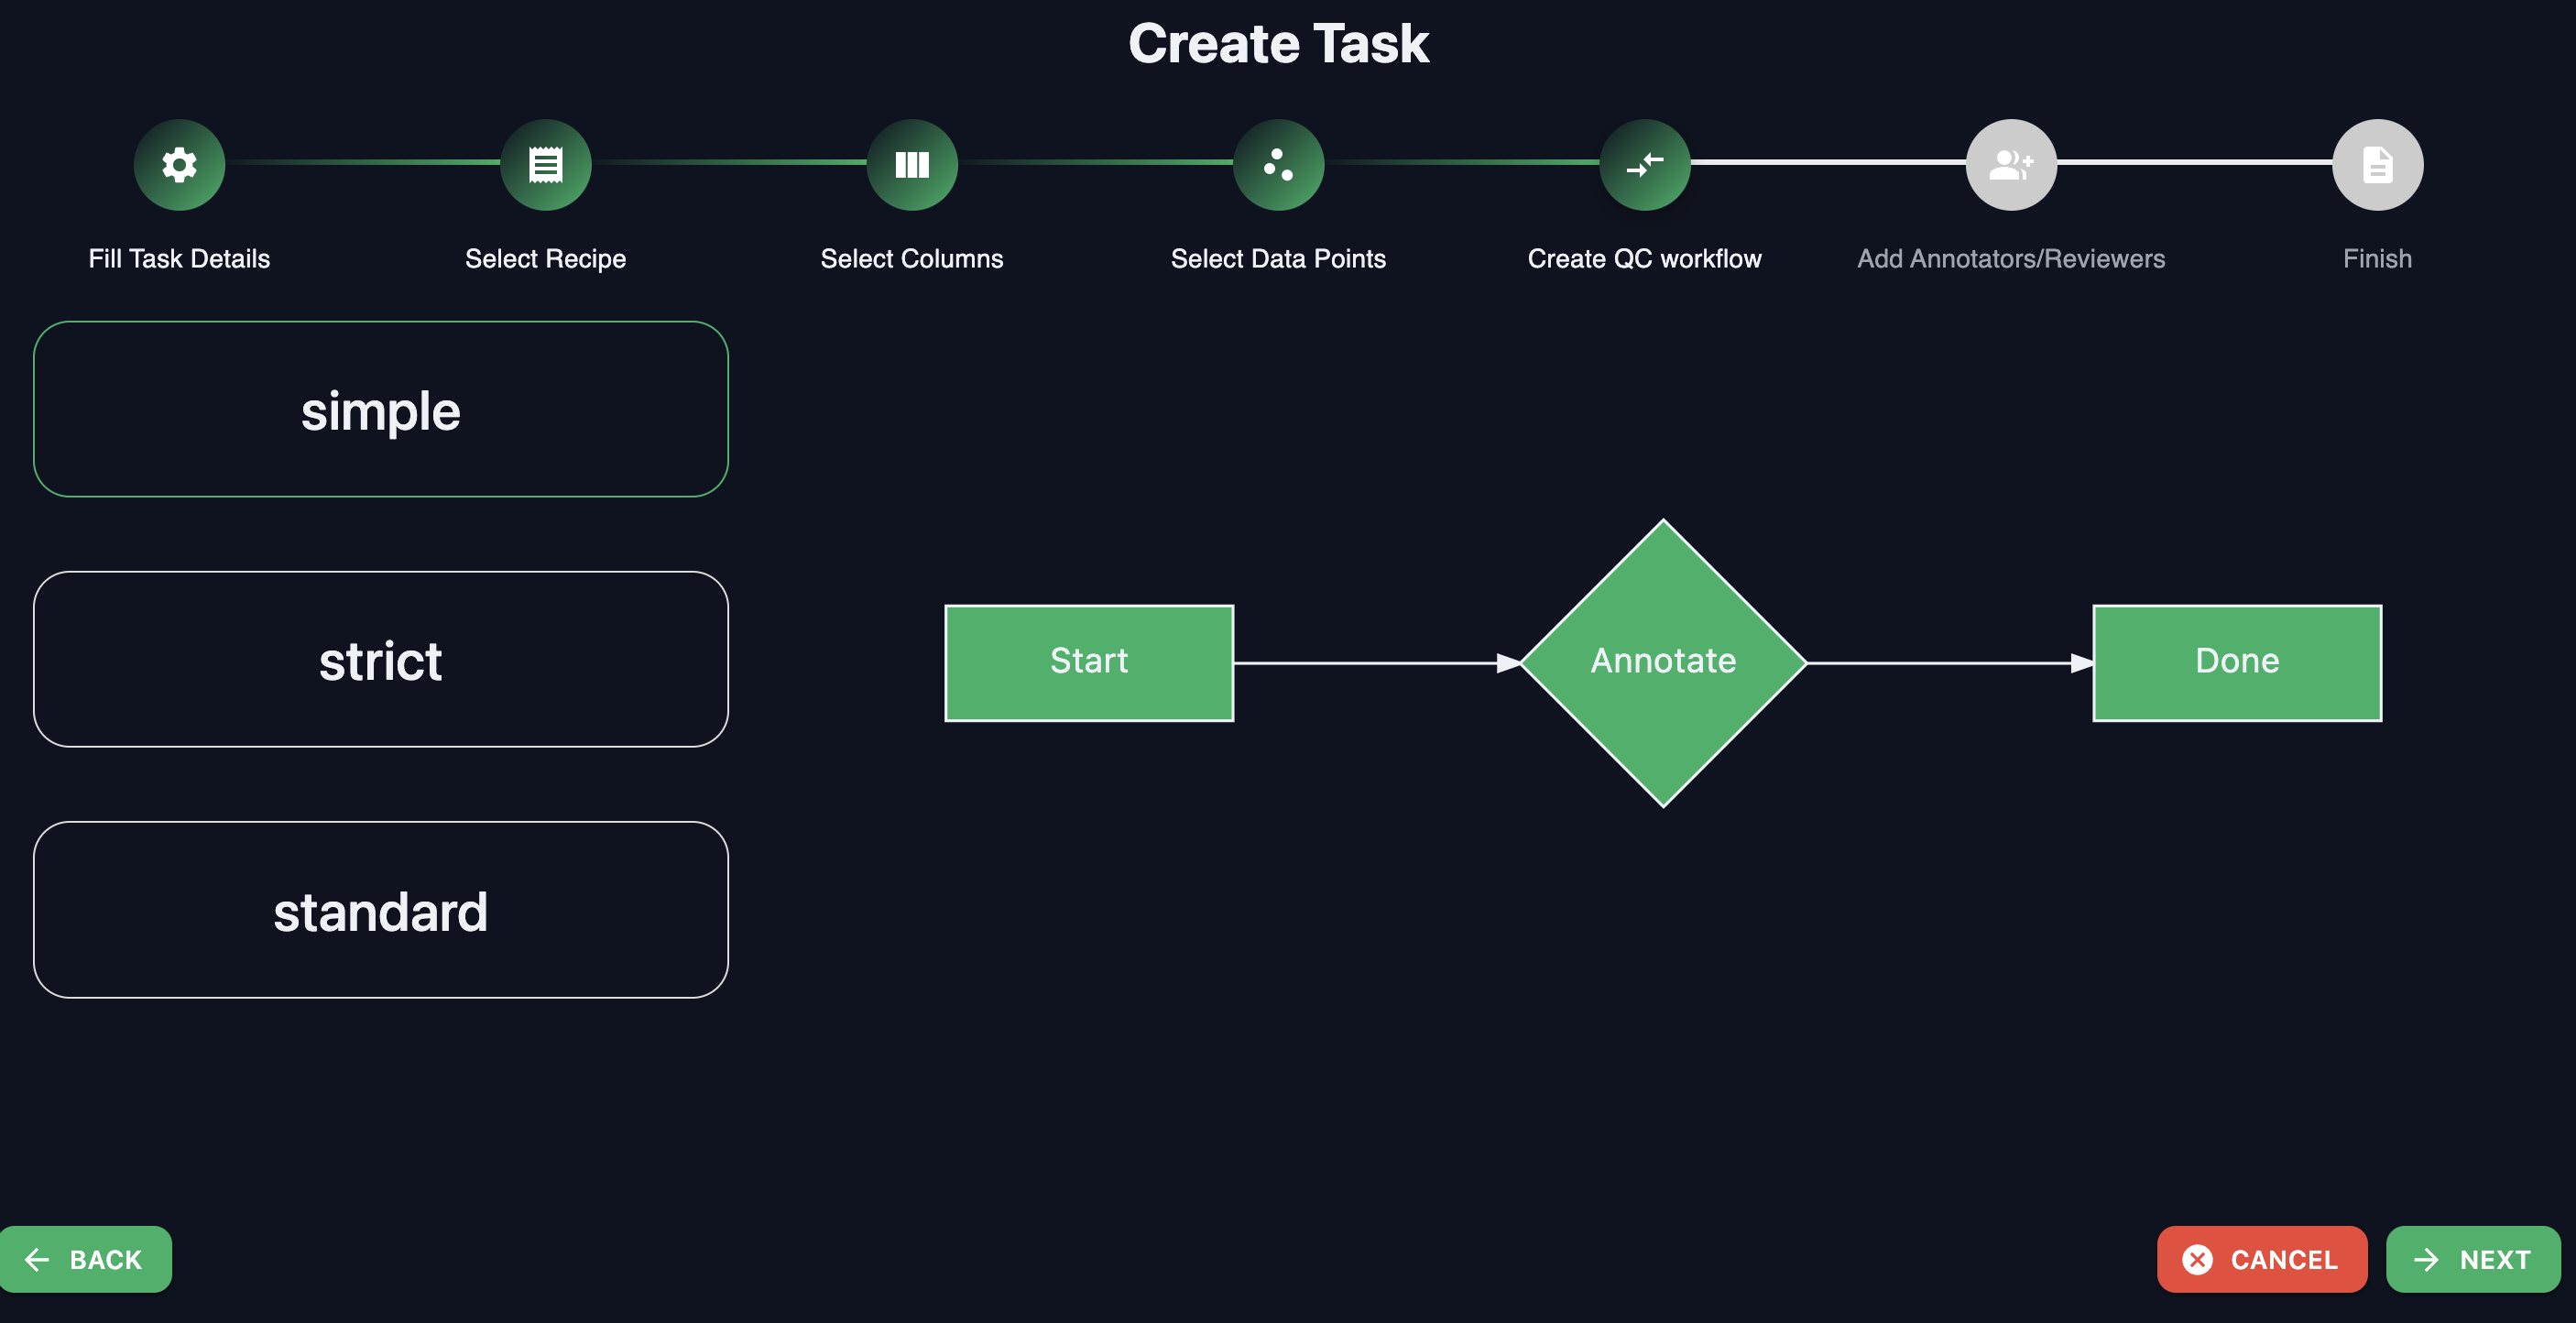
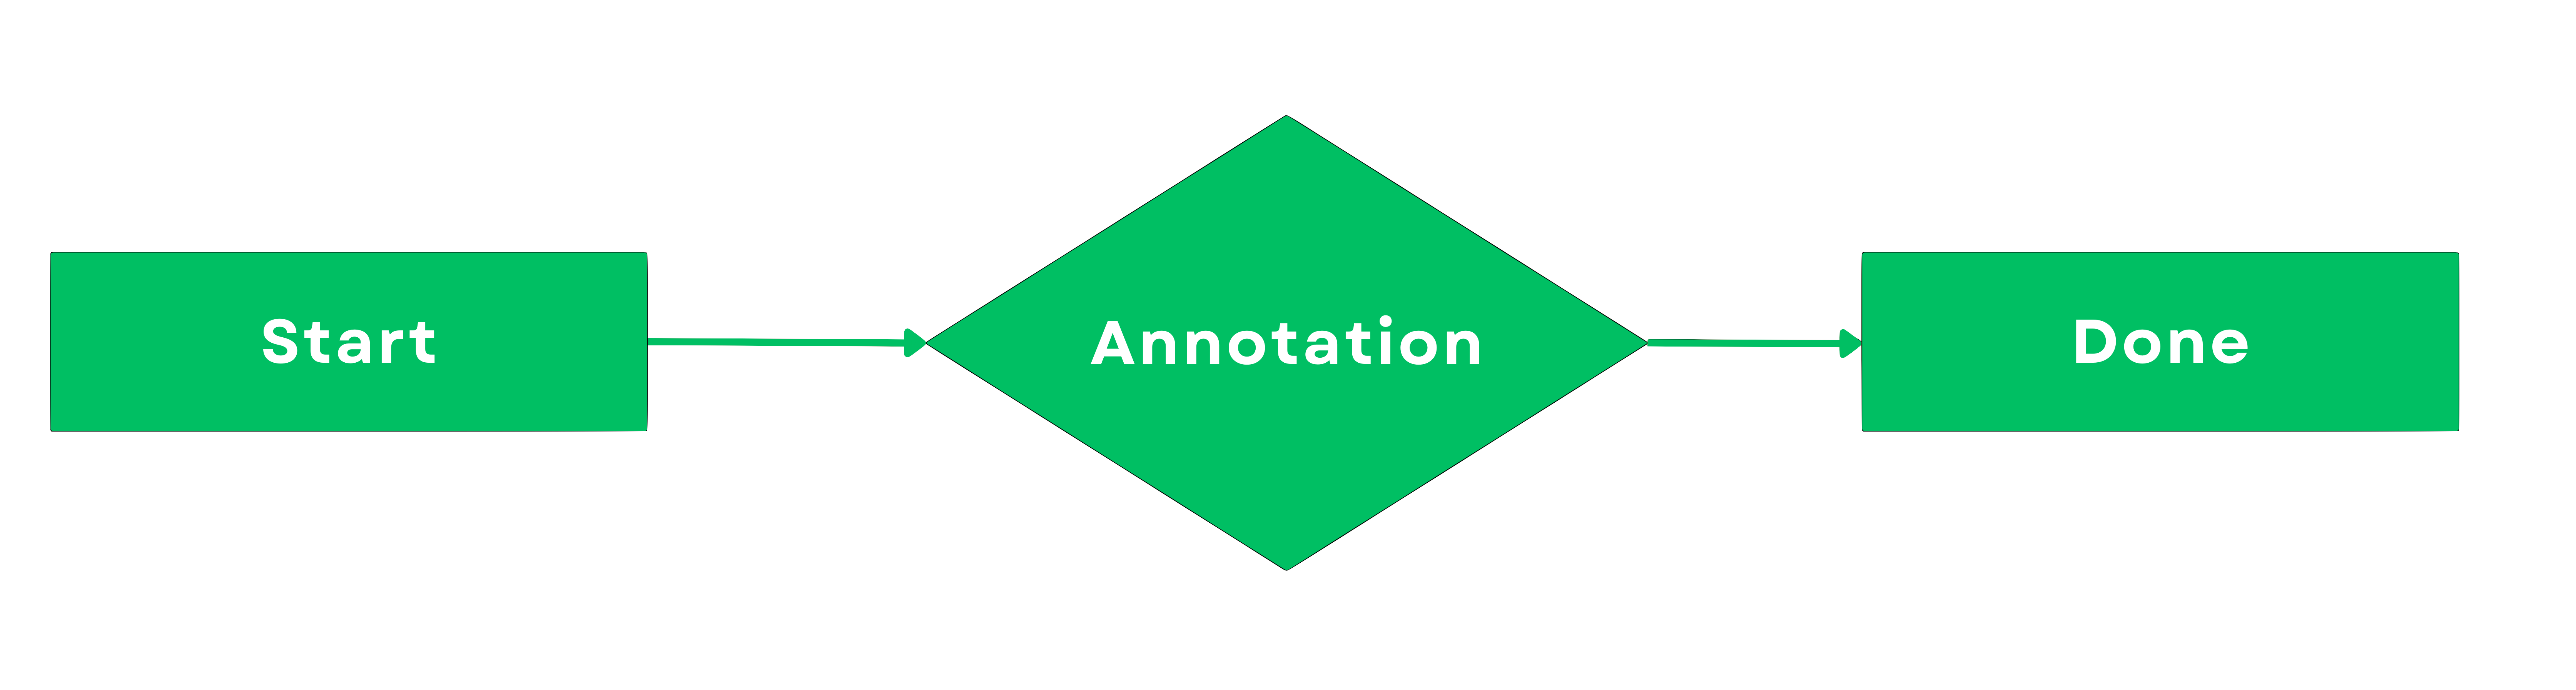
Simple
Simple workflow is ideal for annotation job that needs to be completed fast. There won't be any review of the annotated data in Simple workflow. Users can still have the quality check by creating an additional QC task in the task home. To details on the QC task creation is given here.
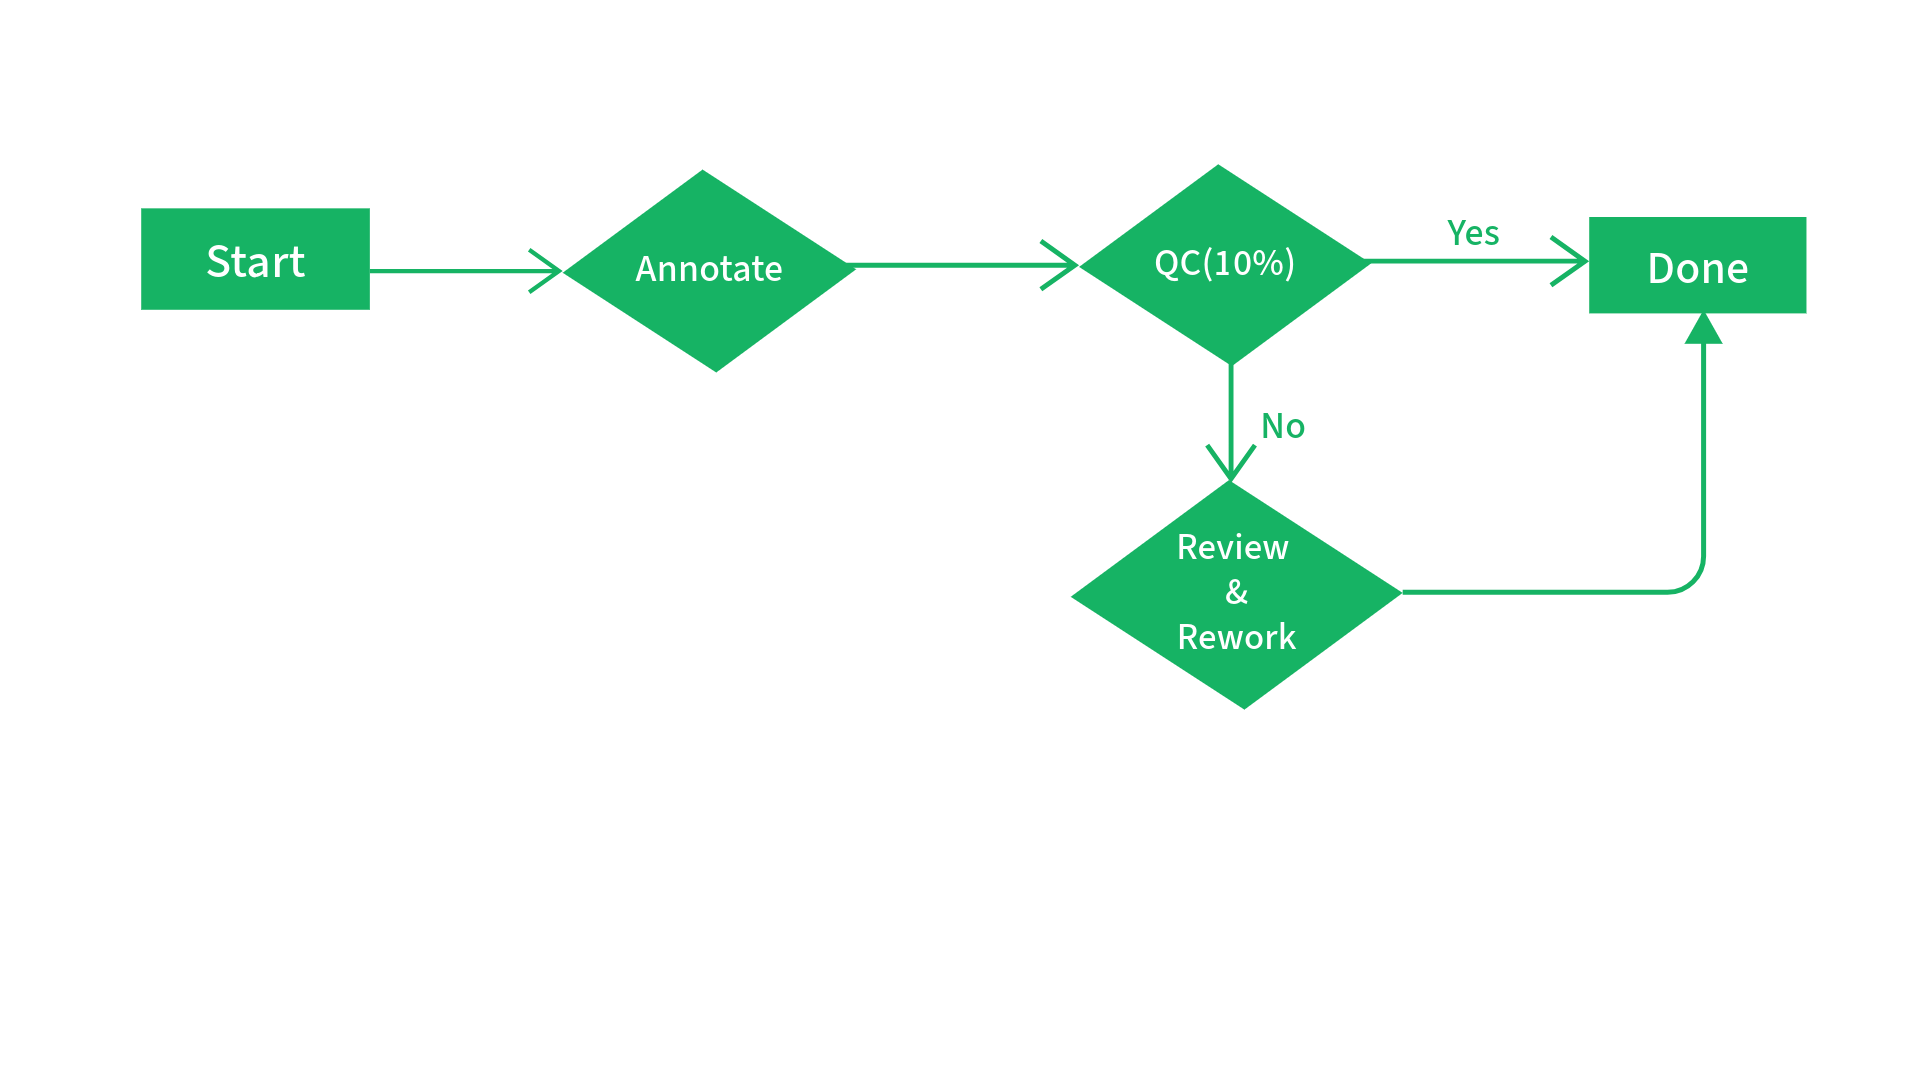
Standard
Standard workflow is suitable for annotation job that need to have a balance on the speed and quality of the task. In a standard workflow, there will be two QC stages and the user can define the percentage of total data to be reviewed at each stage. A precision will be set by the user and if both the QC steps satisfy this precision, then the annotation will be labeled as completed. If the quality check fails to meet the precision at any of the two stage, all the data will be send for the review and the data failed to pass the review will be moved for re-annotation. A detailed image is given below:
Strict
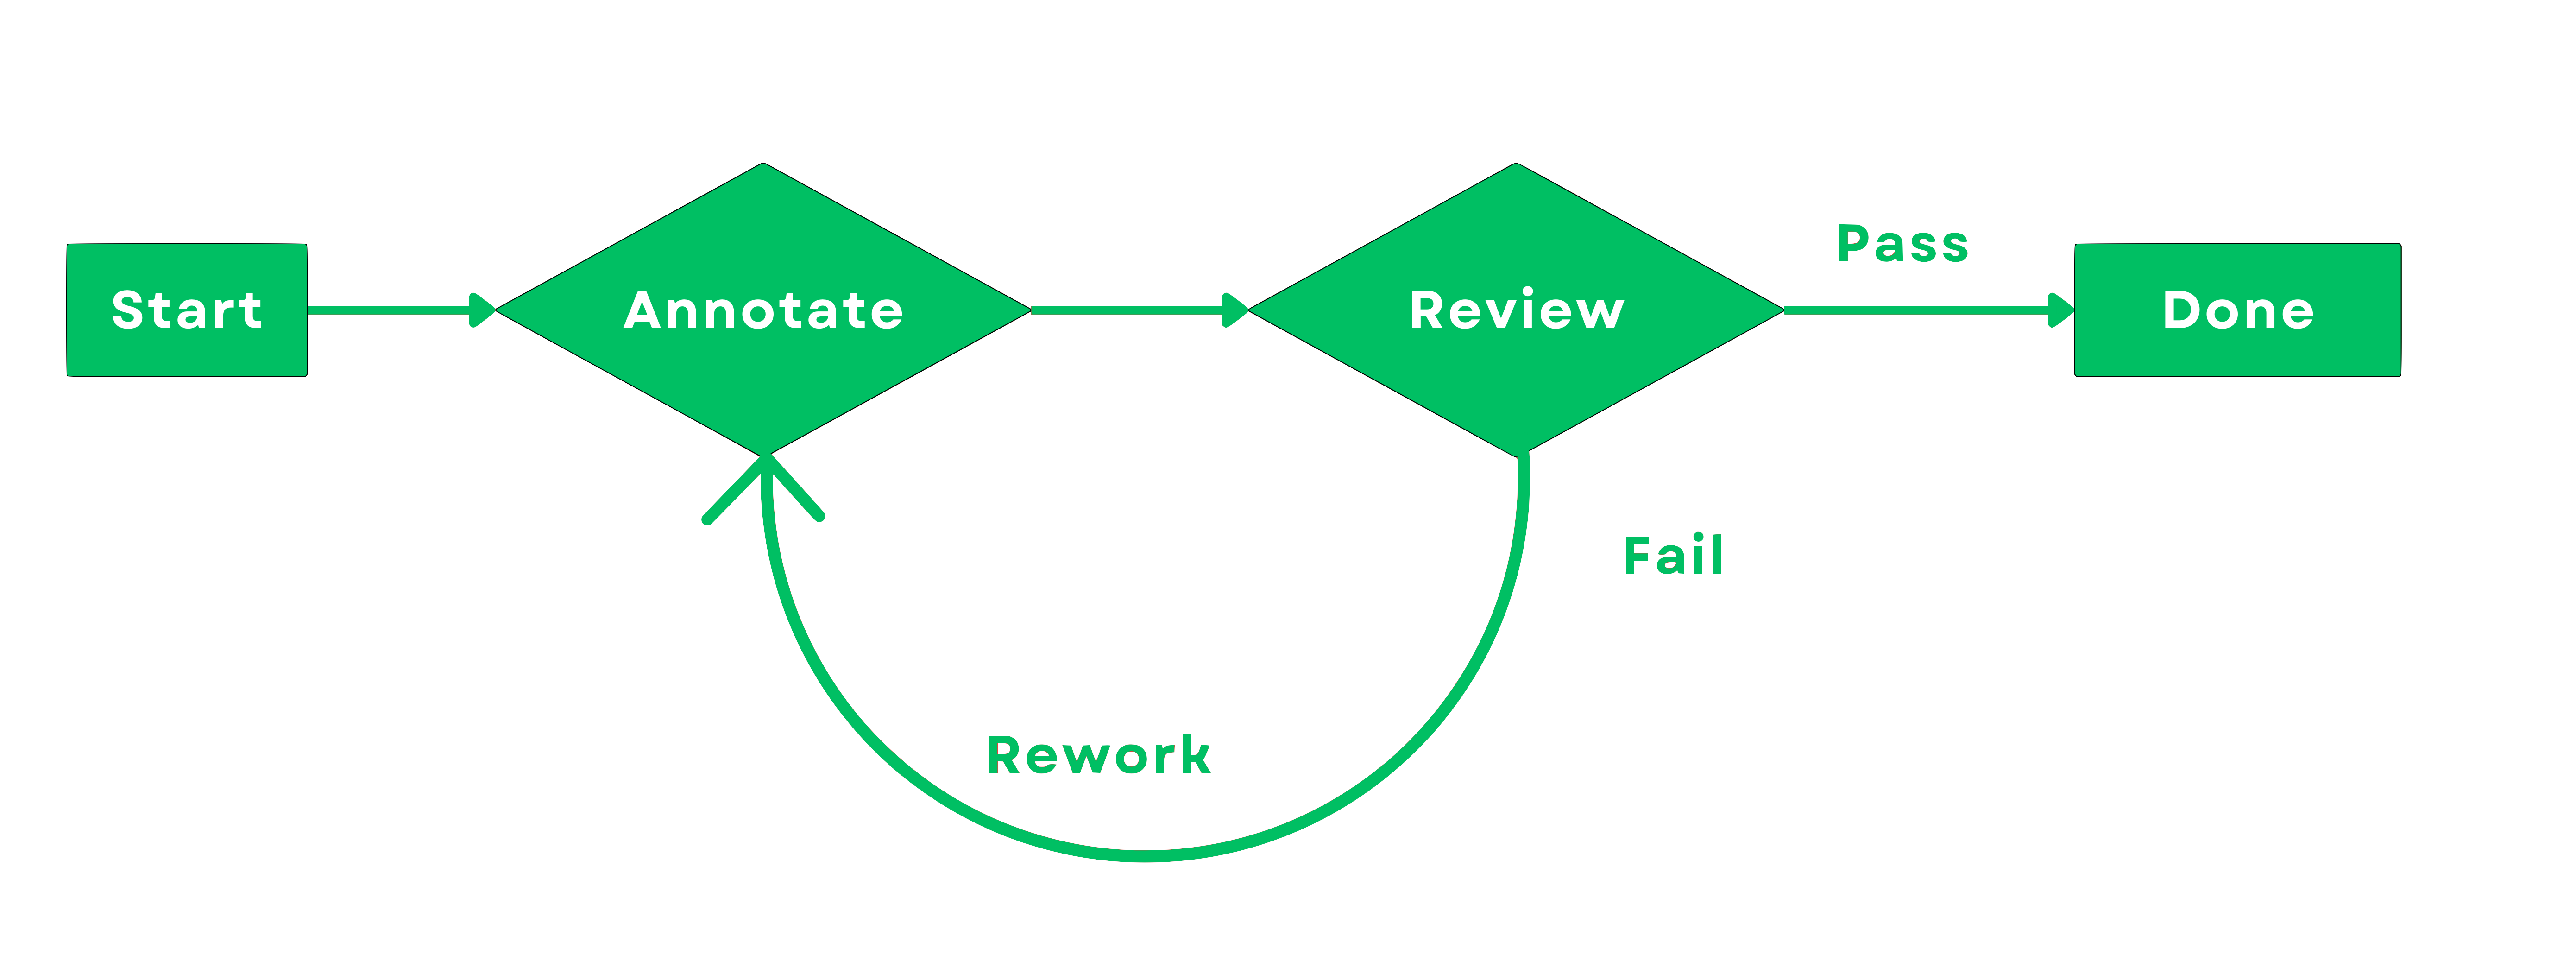
Strict workflow is for annotation jobs that has very hogh quality standards. in strict workflow, all the annotated data gets reviewed by a reviewer and the data rejected by the reveiwer is send for rework.
Annotators and Reviewers
In this section, one can select the required annotators and reviewers for the jobs.
Annotators
From the list of available annotators add the required annotators by checking the box.
Reviewers
From the list of available reviewers add the required annotators by checking the box.
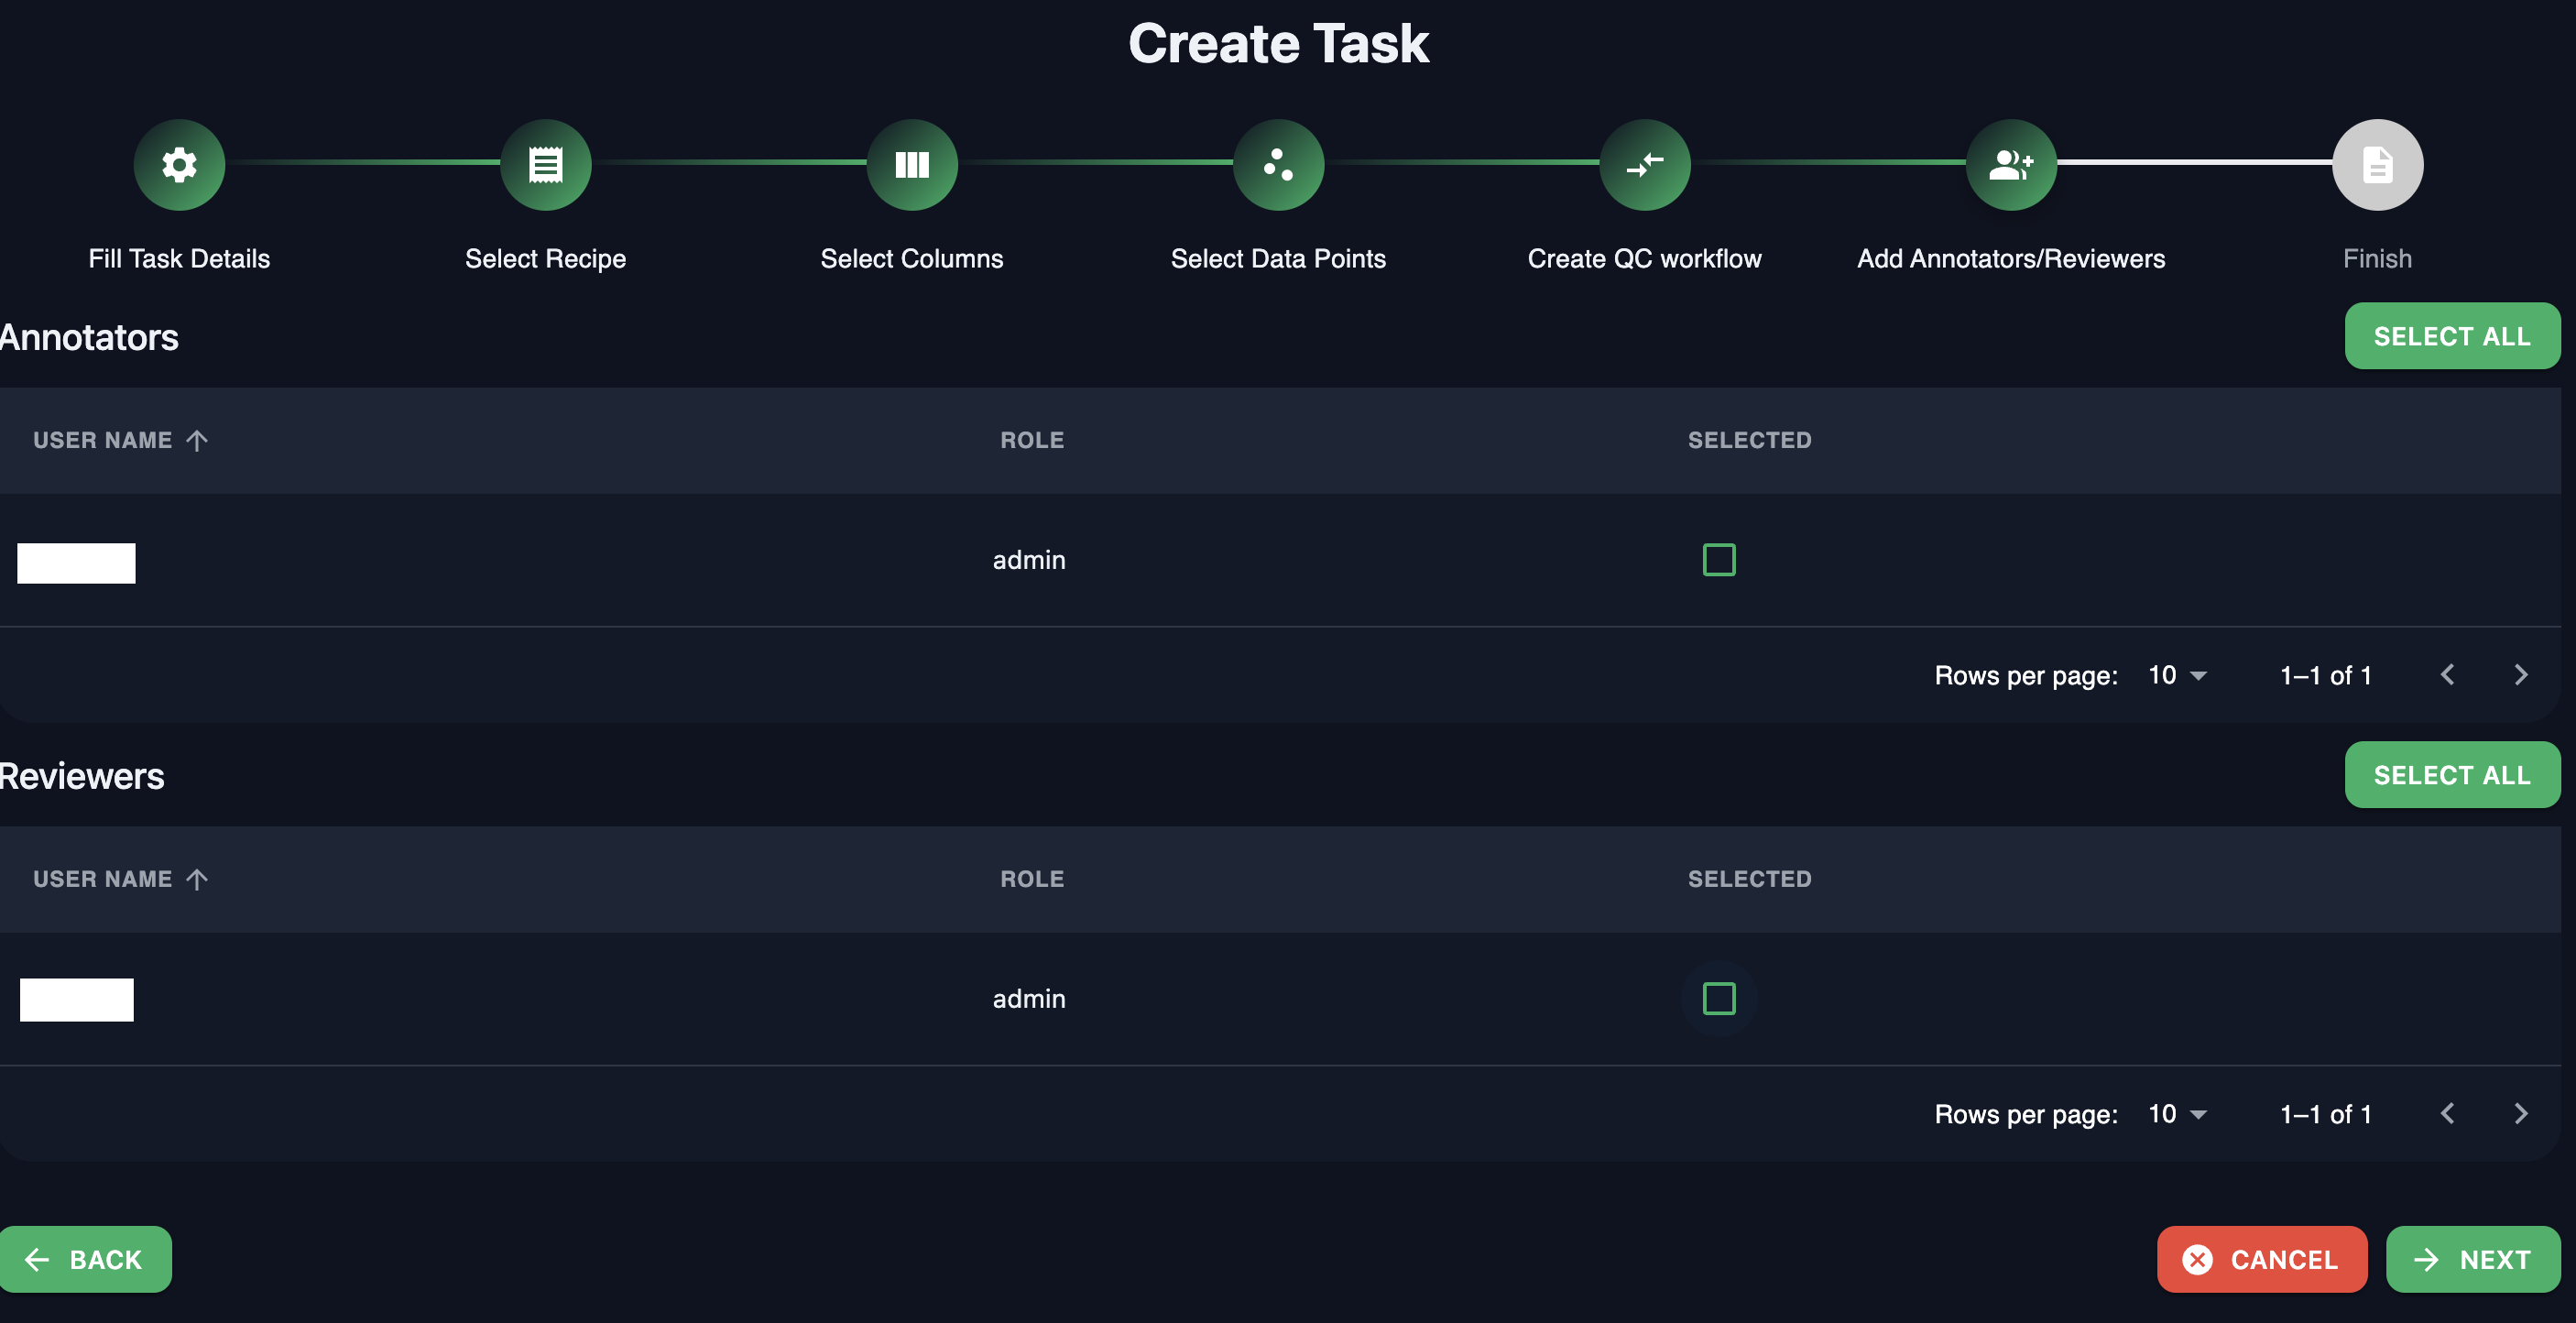
Note: Only the annotators or reviewers those are part of the project can be seen in this page. Add the required users in the Users tab in project page.
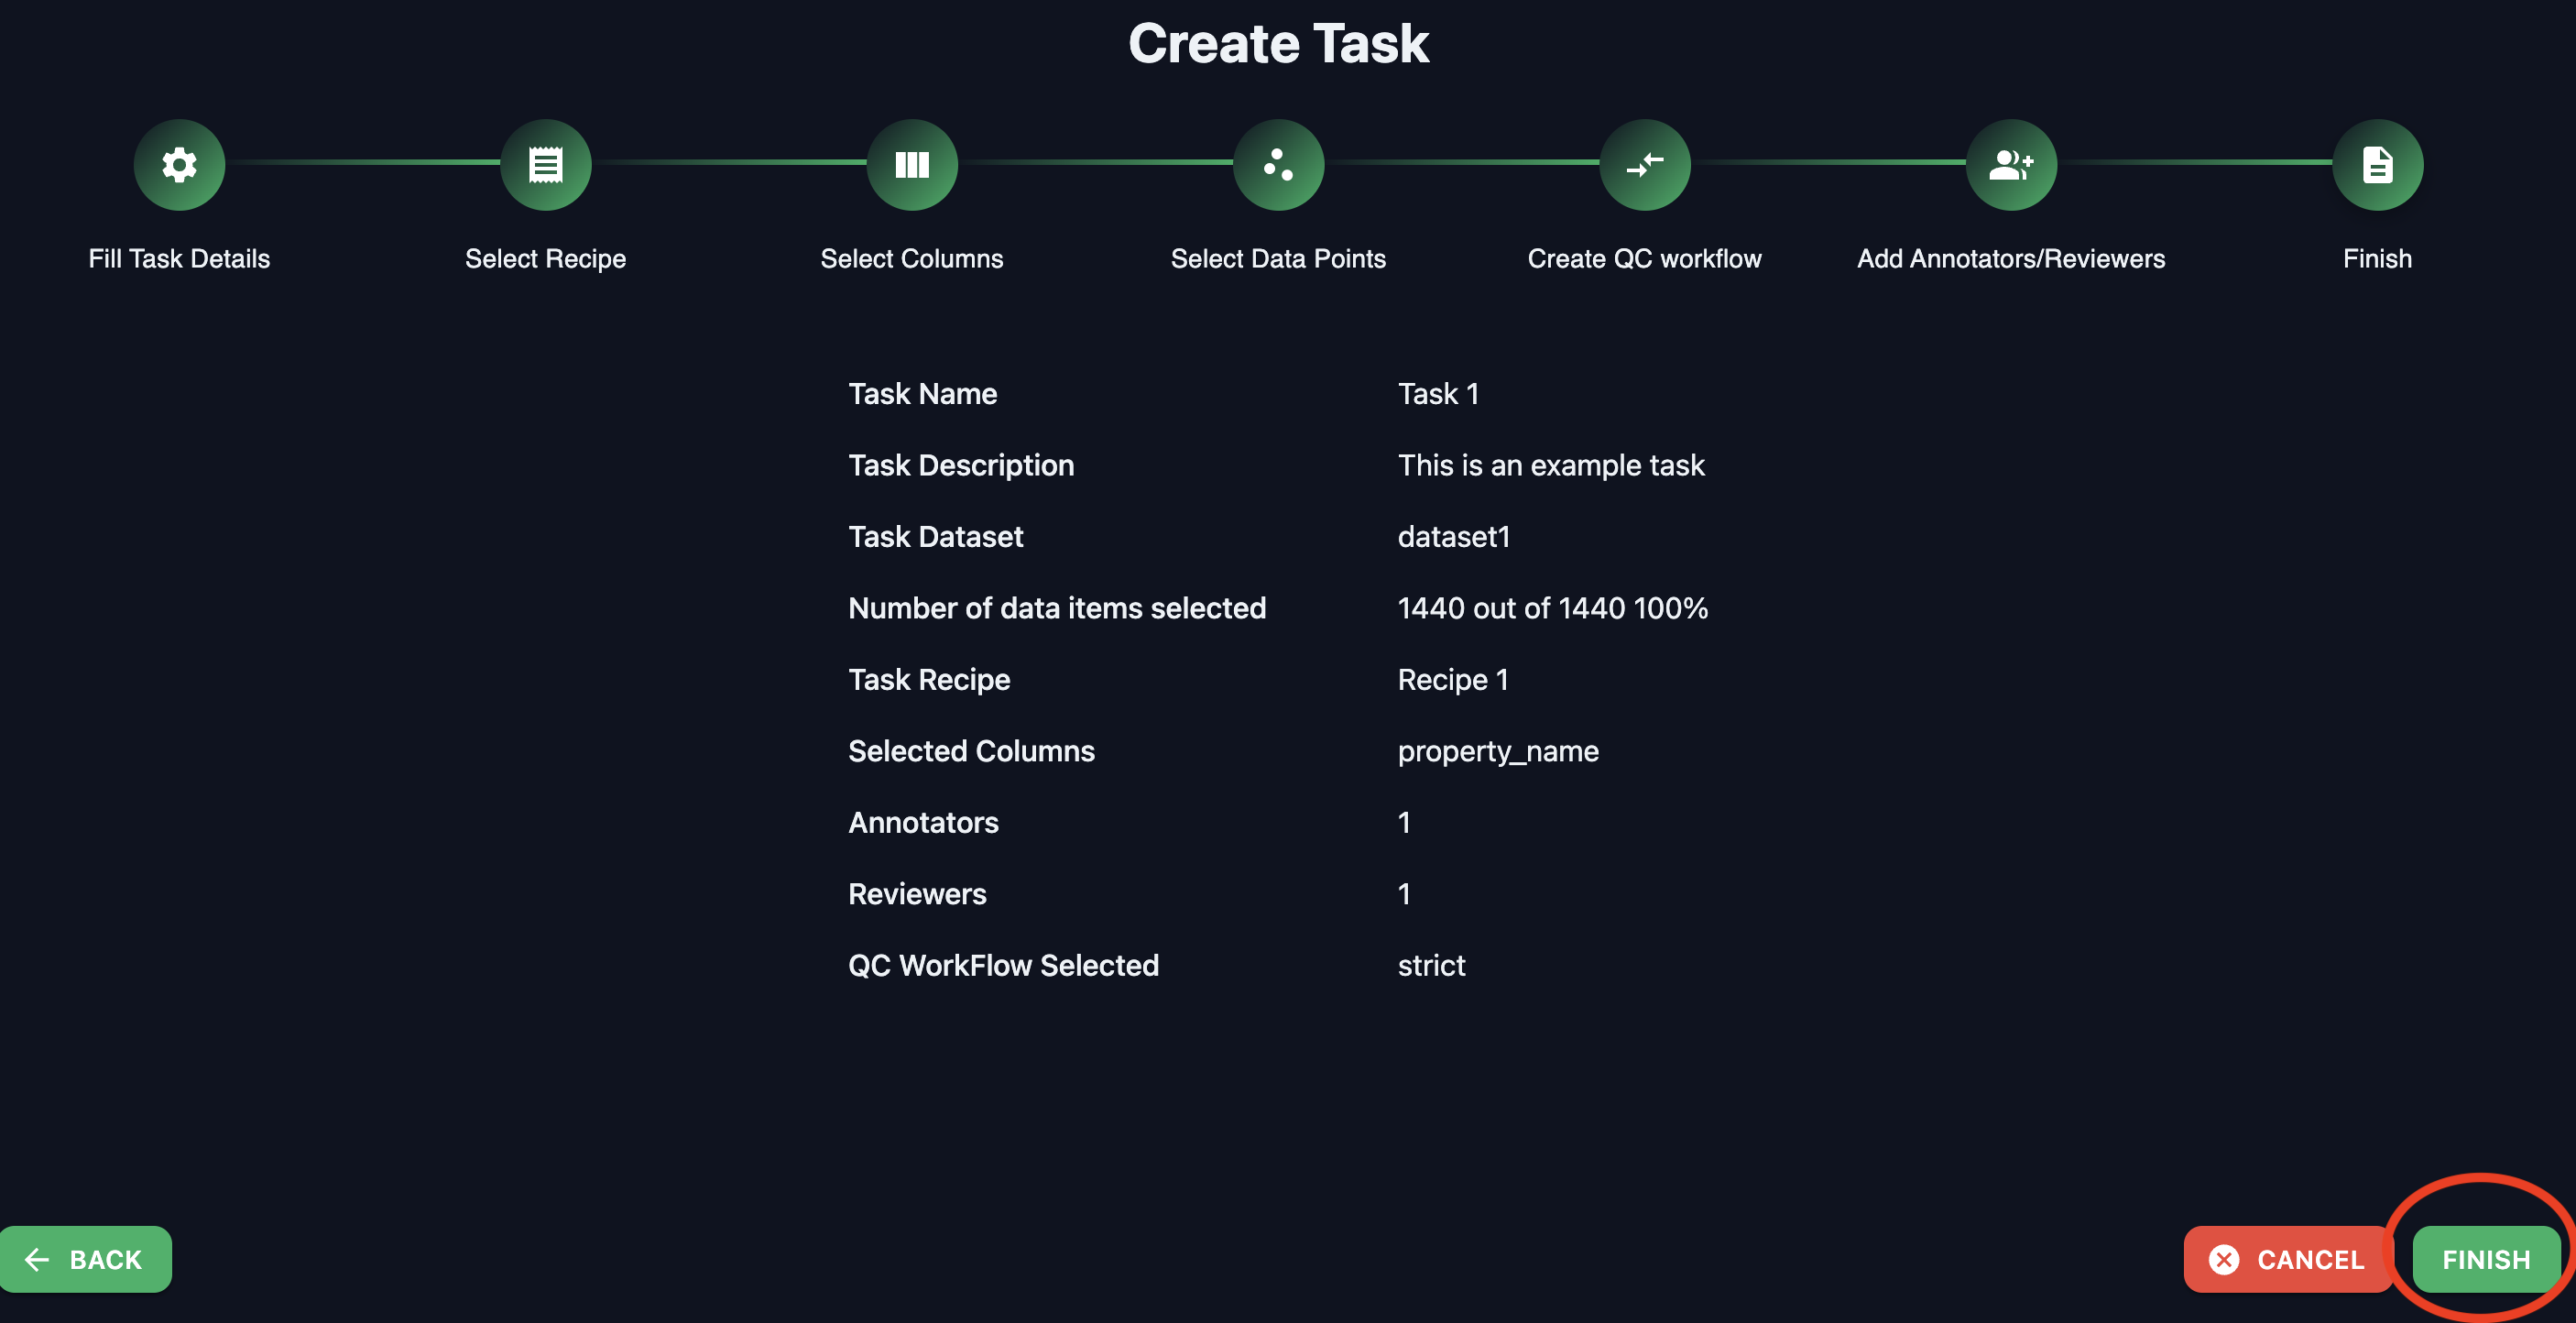
Summary
Confirm all the selected details in the Finish section. Click on the Finish button to complete the task creation